Notes on repairing my father-in-law’s Lenovo B590
My father-in-law dropped off his Lenovo B590 laptop that had a few peculiar issues. The main problem, and reason it landed up with me, is that it was randomly turning off.
This entire process took way longer and was way more complicated than it should originally have been and is probably a few day’s (at least) worth of googling, reading and thinking.
Searching for information on Lenovo laptops, it appears though that this is a relatively common problem.
💻 Laptop Details
Lenovo B590 - 20208
Intel Core i5-3230M CPU @ 2.6GHZ
6.00 GB RAM
Getting the machine to boot was harder than it should be, it seemed to only boot-up randomly. Pressing the power button caused the fan to spin up, LCD backlight to come on and the LED’s to come on however the machine didn’t go any further, holding the power button for ~20secs got it to switch off again, occasionally it would actually boot-up.
On the odd occasion that I got the machine to actually boot-up and start Windows 8.1, the machine seemed to be reasonably stable, however if the machine turned off it’ll often not boot back up.
⚠️ Warning This is not a guide on how to fix the problem. I do however hope that some of this information will be useful to those who are brave enough to attempt fixing this issue themselves.
Diagnostic Process 🩺
Clearly the hardware seemed to work, at least some of the time, obviously it was some kind of intermittent problem preventing the hardware from booting all the way.
🌡️ Temperature
My first guess was it might be temperature related as leaving the machine off for awhile seemed to improve your chances to get it to boot-up. With some of the covers off its easy enough to blow some cold air over the motherboard and see if it makes any change to the boot-up process.
Unfortunately it didn’t make any difference, a quick check with my finger didn’t show any parts of the board that were particular hot/warm in places it wasn’t expected, unfortunately that’s all I could do with my limited test gear (anyone want to donate a Flir camera?).
I did replace the thermal paste under the heat pipe adapter on the CPU just in case that was a problem. It’s easy to do while I had the laptop disassembled.
🔌 Power
Next guess was it could be power related, perhaps a missing power rail or a faulty/dying capacitor was causing power problems.
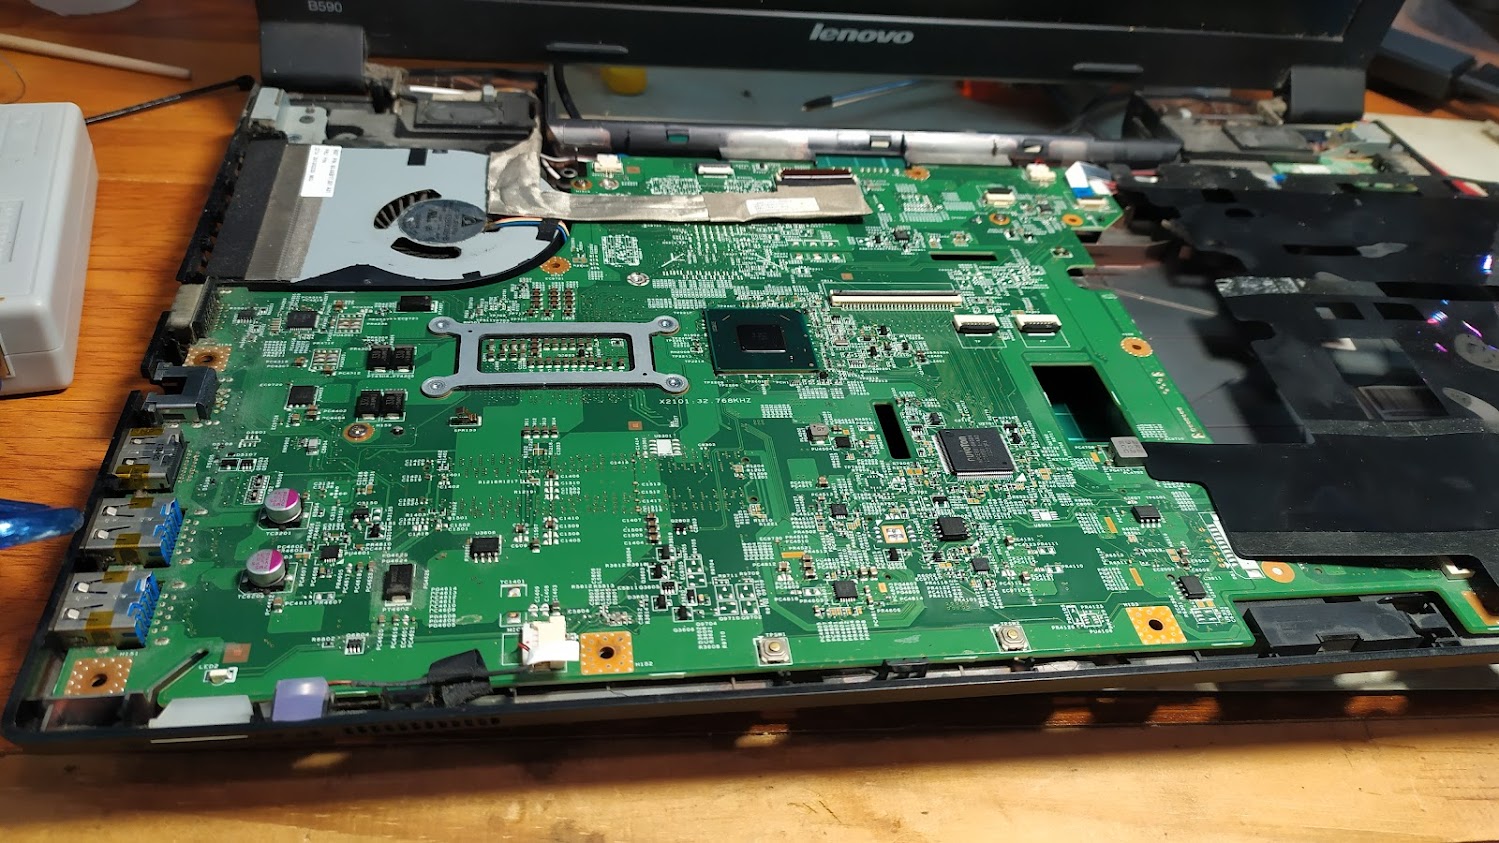
Looking at the board there weren’t a lot of capacitors on the motherboard and the ones there didn’t look damaged/bloated (Obviously a bad capacitor can still look “normal”).
Some googling and I found a schematic for the motherboard (or at least a similar motherboard) this gave me enough places I could check for voltages, all of which seemed to be okay and in the expected range.
💾 Software
Modern computers have a lot more software than you would think, obviously there is the OS but there is also a bunch of firmware that all gets run long before any OS kernel starts.
On one of the odd occasions the machine did boot I ran the Lenovo Support / Diagnostic software in Windows, it didn’t show anything wrong, however I noticed that the Model No, Serial No and BIOS Version No fields were all blank which was very odd.
On the few occasions the machine did boot I could also never get into the BIOS or get any of the other boot-up menus to show up so that I could make it boot off another device.
Slowly I started wondering if the BIOS could’ve gotten corrupt, perhaps an upgrade failed or some flash chip had a few critical bits flip.
🗒️ Side note I’m old enough to still remember the Chernobyl/CIH virus from the early 2000’s that would corrupt the BIOS by writing to the flash chip and which prompted many motherboard manufacturers to have dual BIOS flash chips so you could switch to an older untouched BIOS to recover.
Fixing It 🔧
Now that I had a reasonable guess of what might be wrong it was time to see if I could prove it.
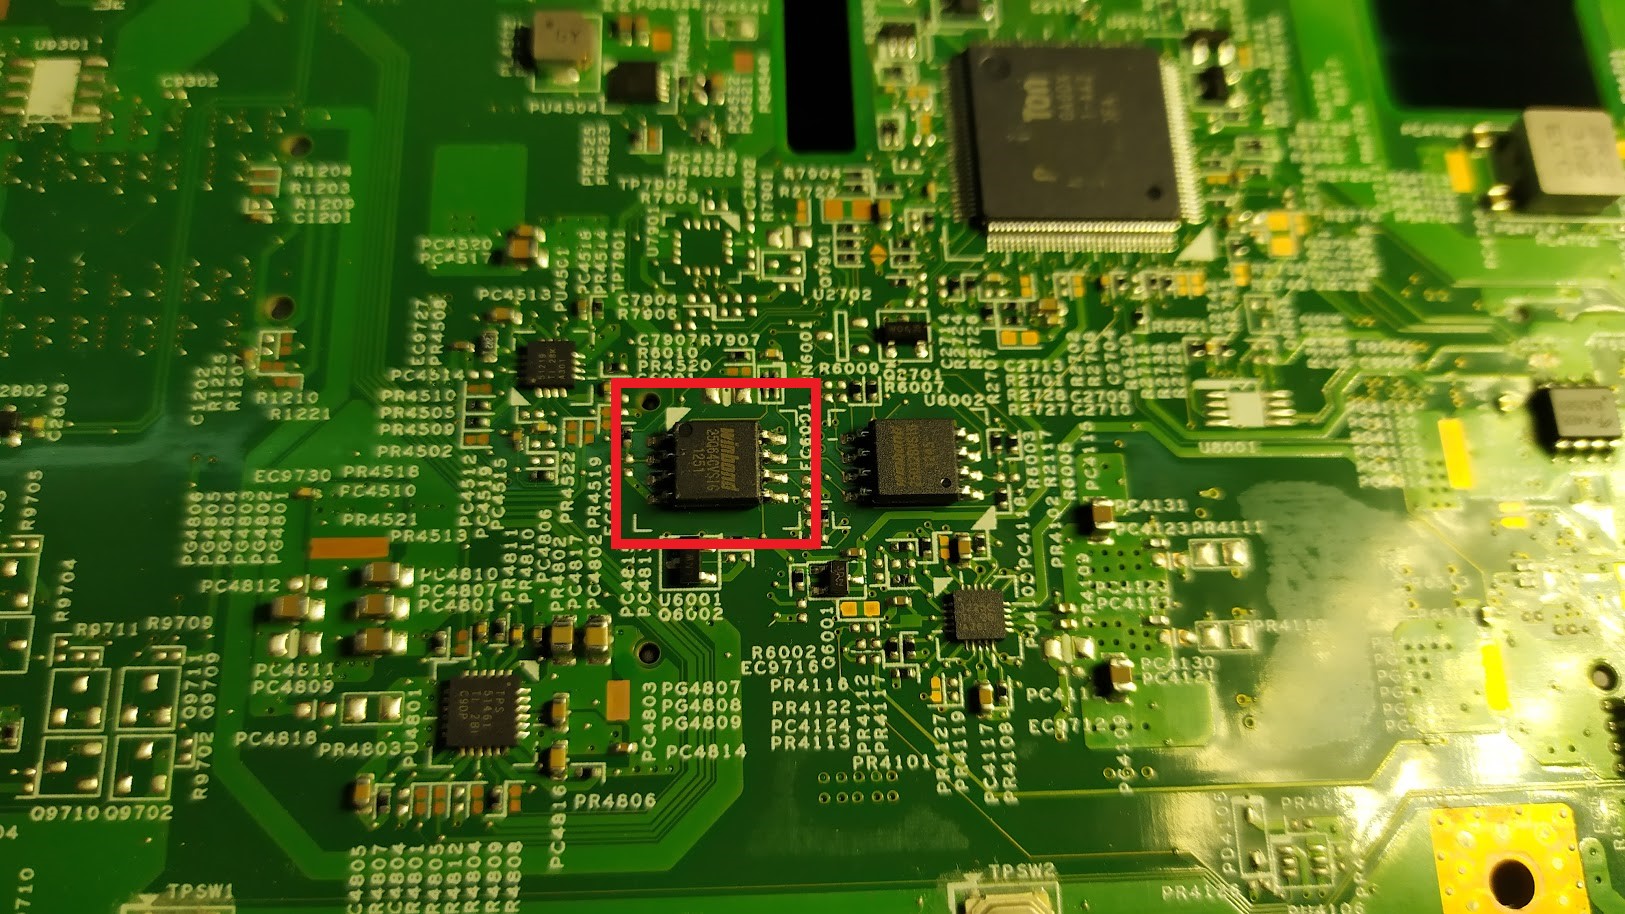
The BIOS/UEFI on laptops is often stored in a Serial EEPROM Chip, one of the common manufacturers for these are Winbond and they’re often in a SOIC8 package, a quick look at the motherboard and I found 2 possible chips. A Winbond 25Q64CVS 64 megabit chip and a Winbond 25Q32FVSIG 32 megabit chip.
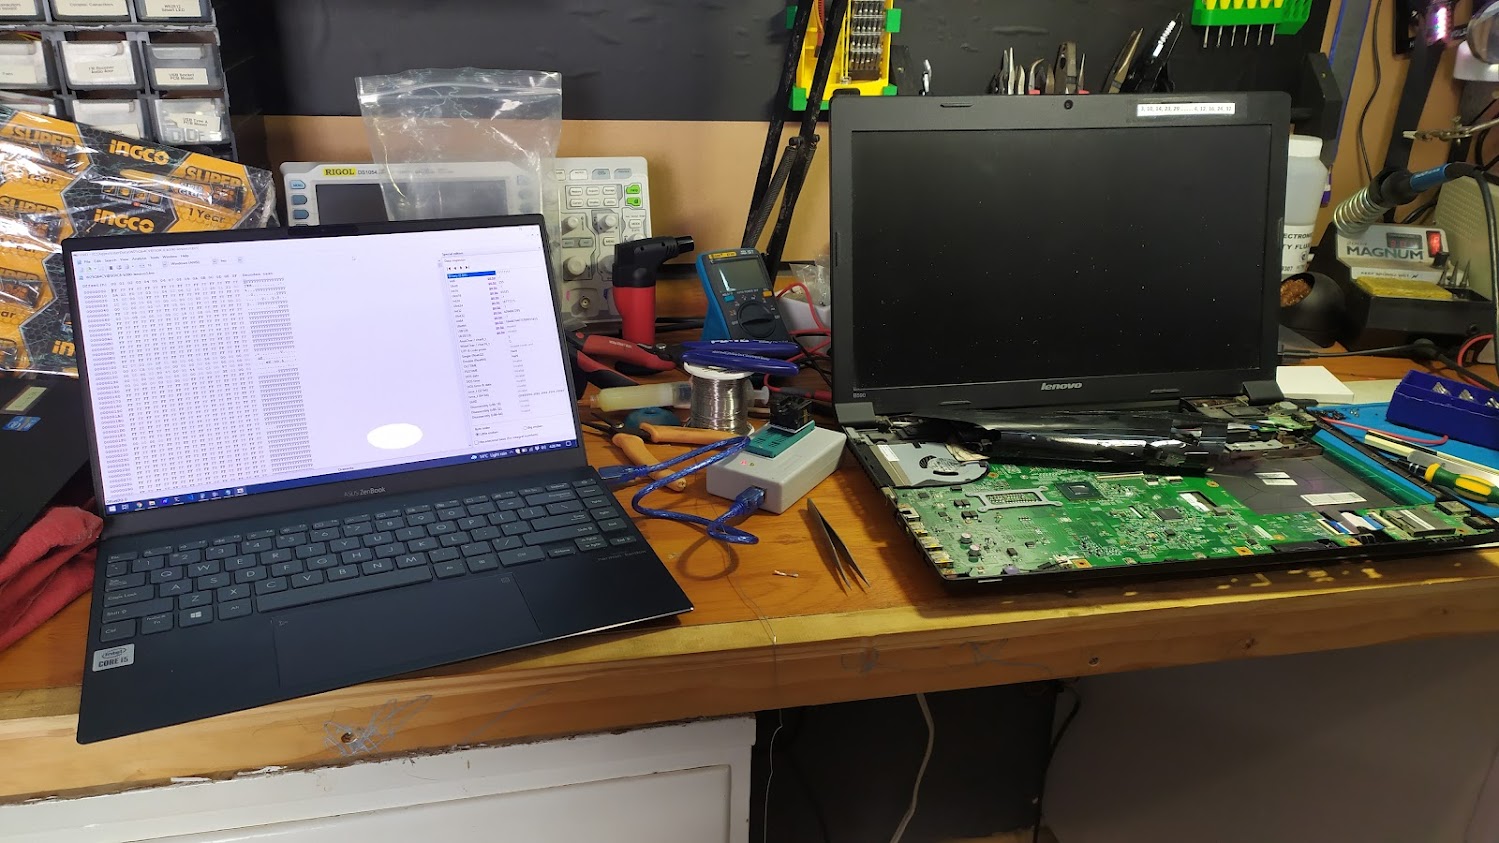
I tried to use my trusty TL866II-Plus programmer with a SOIC8 clip to attempt to dump the flash chips but I’ve never gotten a reliable download of a chip using one of these clips, either it keeps loosing the connection (if it even makes it) or the rest of the circuit interferes with the download.
Some more googling and I found out how things are split in this particular laptop. It appears that the 64 megabit chip (8MB) stores the main “BIOS” (UEFI) and the 32 megabit chip (4MB) stores the embedded controller firmware. My guess was that the embedded controllers firmware was still okay and that it was the UEFI image that was damaged in some way.
Time to warm up the soldering iron and get the chip off, add plenty of solder and a little flux and it came off reasonable easy. Pop the chip into a SOIC8 ZIF socket and put that into the TL866II-Plus programmer and I dumped an image of the chip first time.
🗒️ I like grabbing a few copies and checking that they all match, as I’ve had it in the past where a copy or two gets a little scrambled on the way out.
Thanks to websites like BIOS Mods, where people request mods to override whitelist for batteries and wi-fi adapters, I was able to find a copy of a BIOS that I thought was for this laptop. I wrote it to the chip, soldered the chip back on and powered up the laptop, It booted first time, unfortunately it couldn’t find any SATA controller but I was able to get into the BIOS and poke around and noticed that the Serial No didn’t match the laptops.
At this point I knew I was on the right track, I had gotten the machine powering up and booting every time, maybe my BIOS was the wrong version or perhaps the embedded controller firmware had to be updated as well?
Now it was time to figure out what was going on and while I would love to say I pulled Ghidra out loaded the dump of the original BIOS in it and started disassembling things, I actually pulled out good old strings and ran the dump through that.
grep‘ing the results and I found the serial no in the firmware dump, so at least I knew it was stored on this chip, which would explain why it had changed when I flashed the random image I got off the internet.
Next I started trying to find the version number of the firmware, initially I started with the “working” images version number H9EC07WW(1.00) searching for H9E and things like that but couldn’t find anything. Finally out of desperation I searched for (1. and that’s when I realised my mistake. The version number in the original dumped image was H1ET69WW (1.12 ).
Some googling of the version numbers confirmed what I had done wrong, this laptop was a Lenovo B590 (Model No: 20208) and I had flashed a different model’s firmware, obviously it was close enough to boot the machine but obviously it has a different configuration for the SATA controller.
board 20206 BIOS version:
H9ET63WW (0.63) 09/05/2012
H9ET69WW (1.06) 11/15/2012
H9ET74WW (1.11) 06/26/2012
H9ET77WW (1.14) 10/23/2013
H9ET81WW (1.18) 05/12/2013
H9ET84WW (1.21 )
10/18/2014 H9ET90WW (1.27) 05/08/2015
H9ET92WW (1.29), 08/06/2015

board 20208 BIOS version:
H1ET63WW (1.06) 04.09.2012
H1ET69WW (1.12) 15.11.2012
H1ET73WW (1.16) 10.04.2013
H1ET75WW (1.18) 27.06.2013
H1ET84WW (1.22) 26.11.2013
H1ET85WW (1.23) 15.04.2014

there are also board revisions 20208 with other versions bios
H5ET63WW (1.06) 09/04/2012
H5ET69WW (1.12) 11/15/2012
H5ET73WW (1.16) 04/10/2013
H5ET75WW (1.18)
06/27/2013 H5ET84WW (1.22) 11/26/2013
H5ET85WW (1.23) 04/15/2014
from this Russian forum post http://vlab.su/viewtopic.php?f=58&t=43765&p=361043 (Google Translate is your friend)
Now that I had a version number I started googling the version number in the hopes I could find a copy, ideally if I had I could diff the two copies and perhaps figure out what had gone wrong and patch it, unfortunately I couldn’t find any copies of it, I found plenty of forum postings mentioning it however all the download links failed.
Plan B 🙏
Perhaps I could graft the Serial No, Windows License and other information from my dumped copy onto a newer H1ETxxWW BIOS version. Looking at other dumps of the new versions of the BIOS I couldn’t find any pattern, the Serial No wasn’t always in the same place.
My knowledge of UEFI bios is limited but I know they’re made of different sections (files?), perhaps there was some kind of identifier that was used to find the information rather than a specific location in memory.
Looking at the files I had downloaded from Lenovo I found this one h9et75ww.zip which had the main BIOS image and the embedded controller firmware separate.
In the Copy Machine folder there is a H1ET80WW.IMG which is 4MB and a mysterious 1416_5M.bin which is 8MB, looking at the strings of this file it appears that this is a BIOS image and the partner to the H1ET80WW.IMG.
├───Copy machine
│       1416_5M.bin
│       H1ET80WW.IMG
│       H5ET80WW.IMG
│       H9ET75WW.IMG
│       SUM.EXE
│
├───Crisis
│       BIOS.cap
│       H1ET80WW.cap
│       H5ET80WW.cap
│       H9ET75WW.cap
│
└───DOS
        1.BAT
        Bios.EXE
        chkGPIO.EXE
        CMPBIOS.EXE
        DosFlash.exe
        EC.EXE
        ECIO.EXE
        EEP_INIT.COM
        ERROR.LOG
        FIND.EXE
        fparts.txt
        fpt.exe
        GPIO.EXE
        GPIO.INI
        H1ET80WW.cap
        H1ET80WW.IMC
        H1ETxxWW.BAT
        H5ET80WW.cap
        H5ET80WW.IMC
        H5ETxxWW.BAT
        H9ET75WW.cap
        H9ET75WW.IMC
        H9ETxxWW.BAT
        OUT.BAT
        SMBIOS.EXE
It appeared that in the same location where the Serial No was in the original dump this file just had blocks and blocks of bytes set as 0xFF, my plan was to take a block of the original file and then copy & paste it into this new file, hoping that what ever identifiers it required was part of the bytes I was copying. I copied from 0x3000 - 0x33550 as that seemed to be where all the Serial No and license info was in the original BIOS image.
I took this new BIOS file, wrote it to the flash chip and soldered it back onto the motherboard. Assembled the laptop enough for it to at least boot and powered it on. The machine booted all the way into Windows first time.
Next I checked that the Model No, Serial No and a BIOS Version all showed up in the Lenovo Diagnostic tool and it did. The final test was downloading the latest BIOS Update from Lenovo and running a BIOS update to the latest version, something that didn’t work in the past, and it now successfully ran and updated the machine to the latest version.
🗒️ Additional Notes
Yes I know about Crisis mode, the recover mode for Phoenix BIOS based Lenovo Laptops. Unfortunately I couldn’t get it to work, not sure if it was a case of the laptop being “too far gone” or if the various instructions I had found didn’t work for this laptop.
Here is a link to some info on it, it’s worth giving it a try.
⚙️ Useful Resources/Tools/Links
Hardware Maintenance Manual - Lenovo B590 contains all the details on how to take the laptop apart.
Lenovo B590-LB59A MB-12209-1 48.4XB01.011 Schematic Diagram a schematic I found that seems to be for this motherboard, or at least something close.
UEFITool Useful tool for taking a UEFI BIOS apart, unfortunately didn’t work with the damage image I had.
